

Cardstock:
2 pieces (4 1/2" x 3"), 1 piece (3" x 3") - FOR PURSE BASE
1 piece (2 3/4") circle - FOR PURSE COVER
Scrap pieces for punch out tag - FOR INSIDE PAGE
1 piece (2 1/4" x 2 1/4"), 1 piece (2" x 2") - FOR MINI WRITING SPACE INSIDE
Pattern Paper:
7 pieces (2 3/4" x 2 3/4") - FOR DECORATION OF THIS ALBUM
1 piece (3" circle or scallop circle) - FOR PURSE COVER
Some sheer ribbon - FOR STRAP/HANDLE and FOR DECO ON TAG
Other materials - Scor-buddy or any other scoring tool, adhesive, Scor-tape, shape die cutters (ie. oval, scallop circle, etc, but optional)

Step 1:
Take the two pieces of 4 1/2" x 3" cardstock with long edge across, score each this piece at 3" (see left).
Take the 3" x 3" square cardstock piece and score at 1 1/2" (which is half of this piece - see right.
Take the two pieces of 4 1/2" x 3" cardstock with long edge across, score each this piece at 3" (see left).
Take the 3" x 3" square cardstock piece and score at 1 1/2" (which is half of this piece - see right.


Step 2:
After folding along the score lines, apply scor-tape (or strong double-sided tape) on them (see picture below)

Step 3:
Assemble these pieces to form the shape of the purse like the pictures shown below. (left picture is showing you the way these pieces assemble and right picture is after these pieces were put together.
Assemble these pieces to form the shape of the purse like the pictures shown below. (left picture is showing you the way these pieces assemble and right picture is after these pieces were put together.


Step 4:
Let's work on decorating the purse inside now. Take 1 of 7 pieces 2 3/4" x 2 3/4" pattern paper and score it at 1 3/8". (Optional - If you have a Scor Buddy, a simpler way to score these 1 3/8" line - all you have to do is to move the left edge of your piece to the first line of your Scor Buddy, then score at 1 1/2" - see picture below)
Let's work on decorating the purse inside now. Take 1 of 7 pieces 2 3/4" x 2 3/4" pattern paper and score it at 1 3/8". (Optional - If you have a Scor Buddy, a simpler way to score these 1 3/8" line - all you have to do is to move the left edge of your piece to the first line of your Scor Buddy, then score at 1 1/2" - see picture below)

Step 5
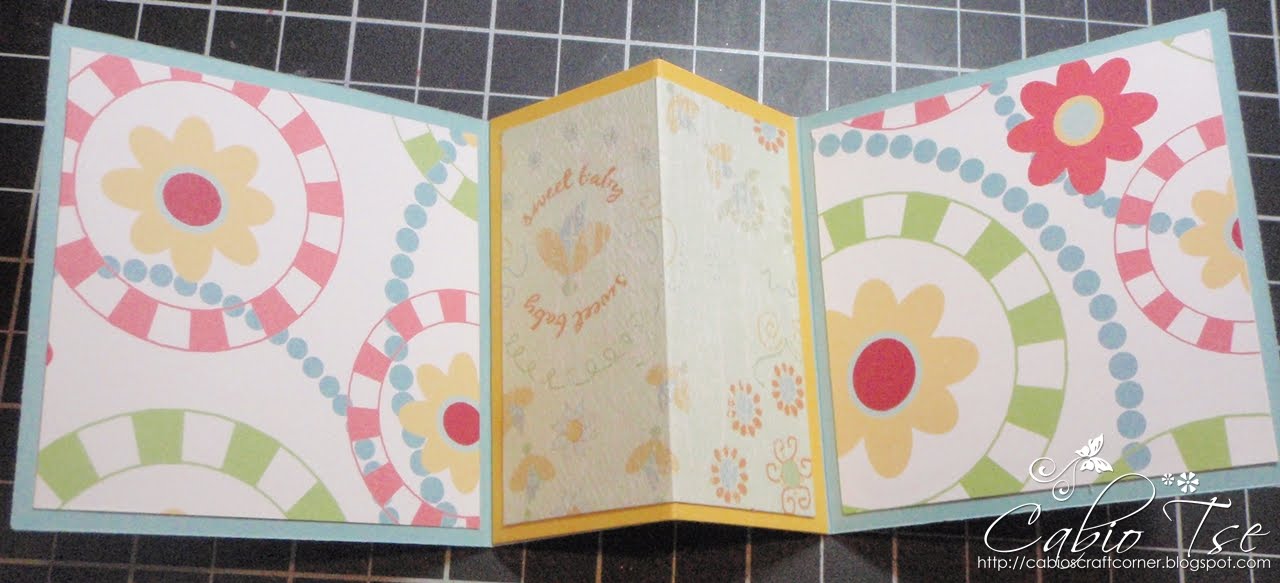
Continue working on the purse inside. Add adhesive to the score piece (one from step 4) in the middle of your purse base (one from step 3) and take 2 more pieces of 2 3/4" x 2 3/4" pattern paper and add adhesive to each left & right side of your cardstock purse base. (See picture)
Continue working on the purse inside. Add adhesive to the score piece (one from step 4) in the middle of your purse base (one from step 3) and take 2 more pieces of 2 3/4" x 2 3/4" pattern paper and add adhesive to each left & right side of your cardstock purse base. (See picture)
Step 6
To make a pocket for inserting the tag:
Take 1 of 7 pieces 2 3/4" x 2 3/4" pattern paper and cut it in half diagonally to form a triangle (see pictures on the left below)
Apply Scor-tape or strong double-sided tape on the 2 short edges (see pictures on the right below)
After finish the above step, you can adhere this triangle to one of the page inside (you can see where to adhere this triangle in the pictures further down below)


To prepare the writing space and tag:
Add adhesive to the 2" x 2" square on the 2 1/4" x 2 1/4" square. Same concept with the larger & smaller tag. (Optional: staple a small piece of ribbon on top of the tag for an easy pull out)

Step 8
With the purse base, adhere the triangle from Step 6 to the right page to form a pocket for insert of the tag, adhere the square for writing on the left page (see left picture). You can also put embellishment to decorate the inside. For this sample, I added some rhinestones (see right picture)
With the purse base, adhere the triangle from Step 6 to the right page to form a pocket for insert of the tag, adhere the square for writing on the left page (see left picture). You can also put embellishment to decorate the inside. For this sample, I added some rhinestones (see right picture)


Step 9
Let's work on the outside now. Take the remaining 3 pieces 2 3/4" x 2 3/4" pattern paper. Repeat Step 4 and Step 5. Assemble the pattern paper on the outside of this album (see pictures below)
Let's work on the outside now. Take the remaining 3 pieces 2 3/4" x 2 3/4" pattern paper. Repeat Step 4 and Step 5. Assemble the pattern paper on the outside of this album (see pictures below)


Step 10
Purse Cover
Add adhesive to the 2 3/4" circle on the 3" circle or 3" scallop circle. (I used the scallop circle for this sample, see left picture).
After putting them together, turn the cover to the back and score at 1 1/2" (which is half of the circle - see right picture below)


Step 11
Apply glue on 1/2 side of the cover (see left picture), then adhere it on one side of the album. (see picture on right)


Step 12
To make a handle for this purse:
Punch a hole on each left & right side edge by the cover (see pictures below)


Step 13
Keep continue working on the handle:
Thread a piece of sheer ribbon (or a soft and thin ribbon) through the holes, and make a knot on each edge, the tied knots would be inside the album. (see left picture)
Take a small self adhesive Velcro and adhere on the cover for closure (see right picture)
Note: you can use a magnet or tie a ribbon for closure instead of the Velcro if you like.


Step 14:
The final step is to color the Mini Birthday Tilda image, punch it out with the oval cutter (or any other shapes you wish). I was going to put this on a bigger oval frame before I glued it on the cover, but found that it was not as pretty, so I decided to glue it on the cover without putting it on a bigger oval first.


Sorry for the 14 long steps, but I like visual tutorial a lot.......
Thank you for stopping by and hope to see you again soon :o)


22 comments:
Oh this is ADORABLE and thank you SO much for the easy to follow direction! Wow! Now I just need it to rain so I can stay inside and try it!
Rene :D
oh thanks for the tutorial. Love this purse. Hope mine turns out half as nice as yours.
Blessings,
Phyllis z
I'm so glad you did this tutorial. I was going to try and figure it out by the picture! :-)TFS Cabio!!
Wonderful tutorial Cabio...your pictures are wonderful and your steps really easy to follow! Thank you so much....hugs...Barb
Cabio, Thank you for the tutorial!! I am going to make it next week for a special project!! Ty again! Hugz!!
Cabio this is just to cute ! Thanks for the instructions...great job
Hugs
Super SWEEET Cabio and such a DARLING project, Thanks for the GREAT tut hun!! Hope you are having a wonderful weekend!
Thanks so much for a great tutorial. It´s really easy to follow anad explains sooo well, that we all can find out to make this adorable purse here. It really is awesome and I´m sure anyone would just love to get something like this. It´s really gorgeous work hun.
Have a great sunday hun and thanks soo much again.
beautiful - thank´s for sharing.
Hugs, Ingrid
This is sooo gorgeous Cabio! Thanks for sharing!!
Hugs Kristel
Oh this is just gorgeous !!!! I love those papers dear and that image is colored just gorgeous as always dear. Hugs
Awesome tutorial Cabio! Thank you for showing us how to make it! I love it! hugs, Angela
Thanks for the awesome tutorial Cabio! Love it! Enjoy the rest of the weekend! ;)
So awesome!! Thanks for the tut hun!! Smiles, Vicki
Hi Cabio, Thank you for the wonderful tutorial on how to make the cute purse album. I can't wait to make one and with your instructions it will be so much easier!! I hope you are having a wonderful Sunday!!
Hugs,
Suzan Laverty
EXCELLENT tutorial, Cabio! This size is so cute and I will put it on my list of "to make" projects! Thank you for the inspiration!
Hugs, Cami
Cabio, you are such a doll for sharing this terrific tutorial!
Cabio!! This is AMAZING!! Thanks so much for the tutorial...I may have to try it for one of our granddaughters...thanks so much. Pat
so cute! what an adorable presentation!
Pam Going Postal
Oh, this is sooo cute!!! And I just love the tutorial (visual tutorials are so much easier to understand :) Thanks for sharing!!
What an adorable project. I may give this one a try. Thanks for the inspiration!!!
Hugs, Karen
really nice work, and thanks for the tutorial,,
=)
Post a Comment