Thursday, May 27, 2010

C. C. Designs DT card for Deb's Creation

Good morning to you all. Today, I feel like a CAS mood, not sure why, but I wanted to do a CAS card which is not my usual style. But once I colored this Mistletoe Snowhill by C. C. Design from Deb's Creations, I remembered I had this purple flower ribbon a while ago, which I think it fits so well on this image. Talking about Deb's Creations, don't forget the Queen of Cards competition is starting on June 1st over at Deb's Creation at Ning. The first challenge is staring on June 1st, so remember to go check out!!

I am using this card for the following challenges:
Aly's Sunday Challenge (ASC18) - Bows and Ribbon
Creative Craft Challenge - Ribbons and Bows
CWC005 - A touch of green

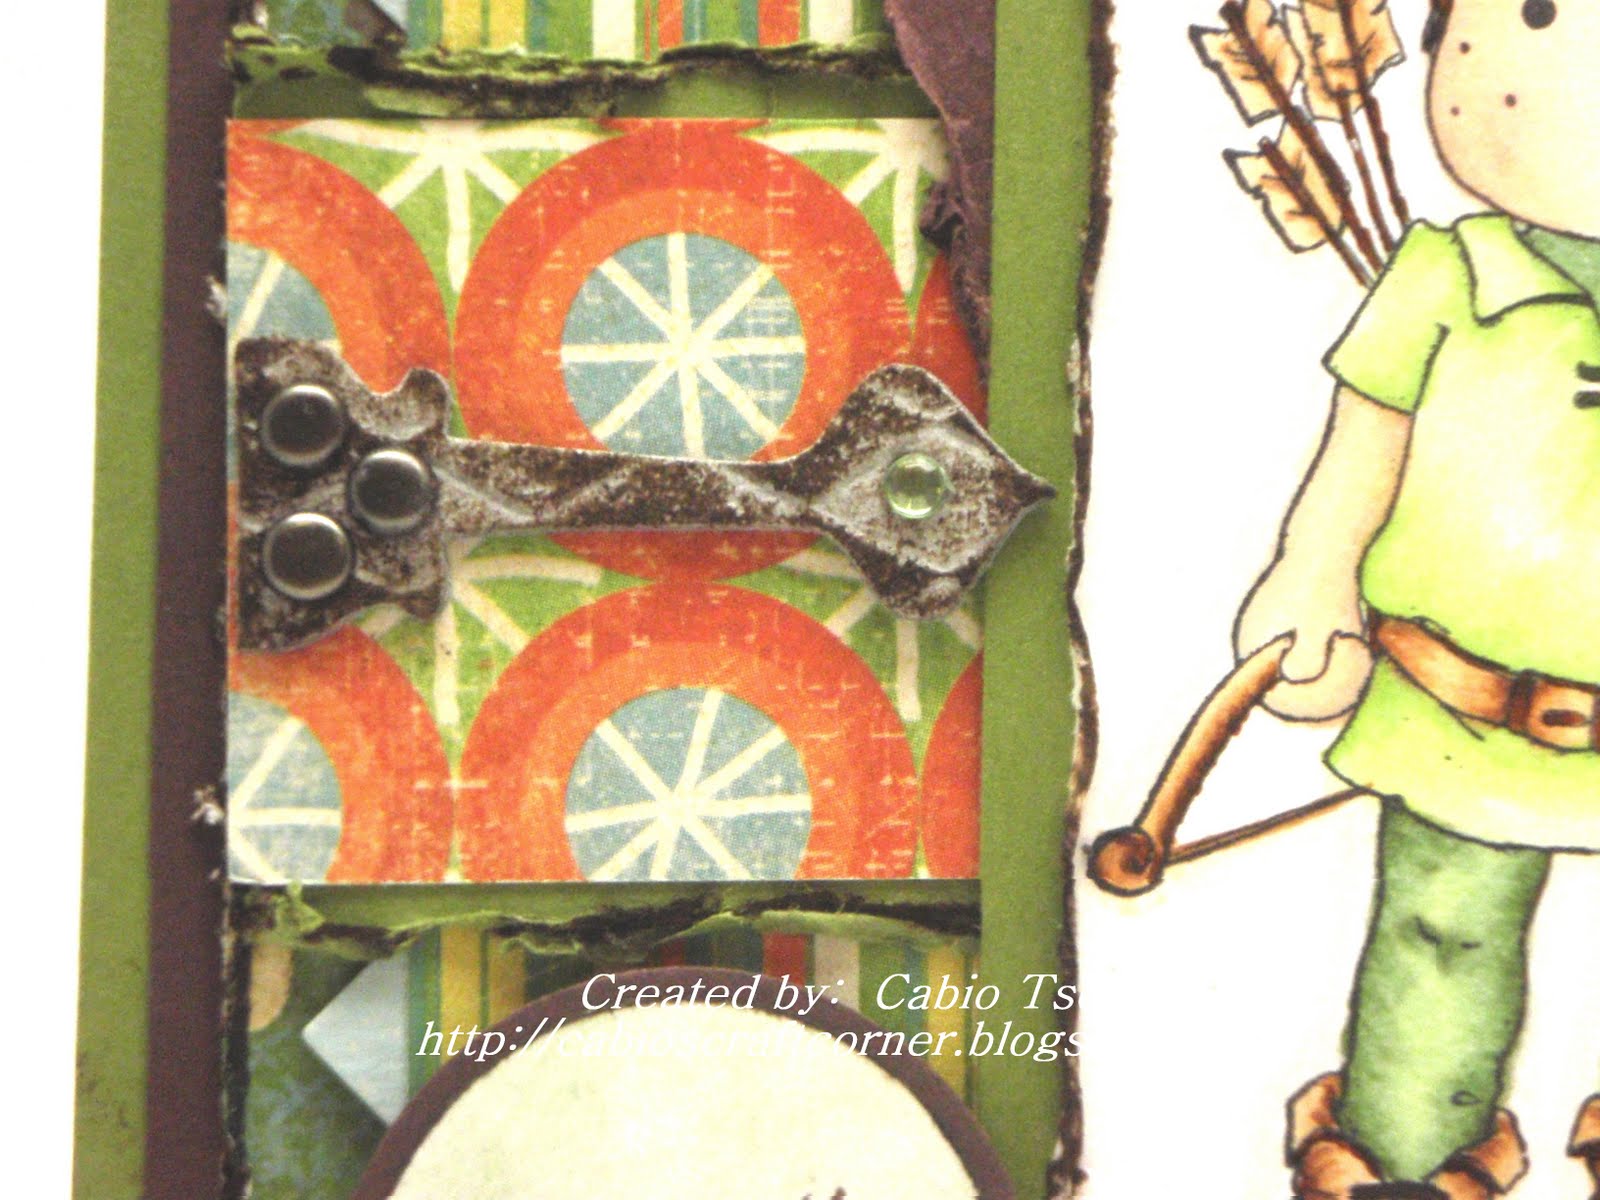
Since this is the image of Snowhill holding a mistletoe, I wanted to keep this within the flower platform, that was why I used the flower ribbon, the purple flowers, the flower DP, and the flower brad.


Here is the cute image


Here is a closer view on the ribbon and the little "dream" acrylic word embellie


Side view of this card

Laid the card flat so you can see the dimension


Ok, that's all I have for you today and hope you like what I share today. I have more projects to show you soon and hope to see you again for my next post. Thank you so much for stopping by :o)

Wednesday, May 26, 2010

YNS Challenge #17 + blog candy winner

***************Update: Blog Candy Winner*******************
Thank you for those of you who participated my YNS blog candy. The winner of this blog candy is #41 - Calypso

Congratulation Calypso, please email me your address info at: cabiotse@yahoo.com

**********************************************************************
Happy Wednesday!! Today is another challenge over at Your Next Stamp. This is the YNS Challenge #17 and our smart Scarlet hosting for today is Maylee. She challenges you to create a project using a border punch. My project today is a card I made using the Aloha Fhiona from Your Next Stamp. For information and details on rules & prizes, please go to the YNS Challenge site and check out the sidebar on the right.

I am also using this card for the following challenges:
Stampin For the Weekend #39- project to make someone smile or cheer up
The Crazy Challenge (CCH16) - It's a Girl Thing
The Pink Elephant (TPE68) - Orange


Here is a closer view on the image. I colored this with my favorite Copic markers


Side view of the card


Here is a pic to show you the dimension of this card


Thank you so much for dropping by today and will see you again soon :o)

Friday, May 21, 2010

Bride Tilda Distress ink + Copic coloring

Good morning, a short post today.
I've never tried painting with distress ink, but since going through so many wonderful bloggers' blogs and saw their wonderful painting job, I decided to play a little with it and see what it would turn out. Also, I've never tried using water color paper before. This image was stamped on a 140lb water color paper.

I bought this Bride Tilda from Magnolia-licious a while ago, but never get a free moment to use it. Today I picked her as my practice and was hoping I am able to get some vintage theme somehow. Hehe, thank you Bride Tilda for letting me to try you!!

I tried to take a pictures on each set of colors I used to share with you today. The Distress Ink I used for this practice is "Walnet Stain".


This is my finished image coloring. As you see, that I painted over the outlines, which happens to me often, because I tend to use the lightest color to brush over top and blend the colors, so for not caring about painting it over the image outline since I usually cut out the images for my projects.


Skin tone: E11, E00, E000, Distress ink


Outline - W00, W1, W5, Distress Ink


Hair & Crown- YR24, YR23, Y17, Y00


Wedding Gown - BG93, W5, W1, W00


Bouquet - R59, R14, R02, G99, G21


Ok, that's all I have to share with you today and hope you like this post :o) Thank you for stopping by today and hope to see you again soon!

Tuesday, May 18, 2010

Deb's Creations DT card - Chanter Heartsong

Good morning and happy Tuesday. Today, I am happy to post my very first DT card for Deb's Creations. I used this Chanter Heartsong from C. C. Design. For those of you who are located in Australia, Deb's online store offers lots of stamps and tons of embellishment and accessories, so be sure to check them out HERE to see all the wonderful stamping supplies. She also ship world wide, so you will never be disappointed. If you haven't join Deb's Creations at Ning, you should, because there is the 'queen of cards' competition that runs from June 1st and the winning of this will win lots of prizes, so please come on over to Deb's Creation at Ning to find out all the details about this.

Here is the card I made with Chanter Heartsong and I am also using this card for the following challenges:

MMSC54 - Sketch
My Time to Craft Challenge #91 - To00o Cute
Practical Scrappers - Patterned Paper
HFOS28 - Get your shine on


Closer view of this darling image. I've added stickle on her dress trim.


I used 3 ribbons/trims on the side (I laid a piece of fibre on top of the lace on the left) and put buttons, rhinestones & pearl flower on top. I actually sprayed glimmer mist on the lace trim on the left to dye it a little orange to match the cardstock. This lace originally is white.


Added more rhinestone flower & pearls on the side


Side view of this card


Flat view picture, so you can see the dimension


I have more creations to share in the next few days and don't forget there is still my blog candy.
Be sure to check it out as the deadline of it will be on May 25th midnight. Good luck!

Sunday, May 16, 2010

Magnolia Robin Hood Edwin for challenges

Good morning and happy Sunday. I had a very productive night yesterday. I was able to finished a few cards. Here is one of them and I am using this card for the following challenges:

Deb's Creation May/June Challenge - Boy card
Friday Sketchers #102 - sketch by Tanja
LLWWC #38 - Anything Goes
Cute Card Thursday #112 - Someone Special
PaperPlay Challenge 10-Week19 - Brown and ?
Craft Ann's Challenge #14 - Anything Goes
Stampin For the Weekend - A card for a male
Our Creative Corner - Masculine Birthday
Secret Crafter Challenge #83 - Metal (metal brads)

Here is my finished card. I don't normally make male theme card, but I got this Sherwood Edwin image that I bought and really think I should try it out, so I did. I received a package from my blogger friend, Linda C last week. Sweet Linda sent me some embellishment goodies and the little cute hinge grungeboard on the middle left of this card is part of the embellies from Linda. Thank you so much Linda, it fits so lovely on this card :o)


Closer view on this Sherwood Edwin


Here is the little cute hinge from Linda and I added metal brads and a piece of rhinestone on the hinge.


Side view on this card


Flat view to show you the dimension of this card


Stamp: Magnolia - Sherwood Edwin
Paper: My Minds Eye
Accessories: Distressing tool, circle punches, grungeboard - hinge, die cuts, rhinestone
Copics:
Skin - E11, E00, E000, W3
Hair - E49, E37, E41
Shirt - YG03, YG11, YG00, YG0000
Pants & Hat - G99, G94, G21, G40
Belt - E37, E33, E51
Bow, Arrow & Feather - E37, E35, E00
Shoes - E49, E37, E35, E41

Thanks so much for stopping by and hope to see you again soon :o)

Friday, May 14, 2010

Handmade flowers Tutorial

Good morning everyone. As I promised a few days ago from my Tilda card post, here is the tutorial of for the handmade flower embellishment. Sorry that you only see one hand on these pictures as I was taking my camera on one hand and doing the tutorial on the other hand at the same time ;-p


You need flower punches (any petal shapes), Glitter Mists (Golden Terracotta) & (Pearl), Stickle and Distressing Ink (not shown)


Step 1: spray a very light layer of Golden Terracotta glitter mist on a plastic sheet.
Step 2: Spread the paper petals on the plastic sheet and then spray the Pearl glitter mist all over the petals.


Step 3: Make sure to spray the pearl mist, so that the petal is wet enough.
Step 4: Scrunch each petal into a little ball while they are still wet.


Step 5: Once you scrunched all the petals, wait for a couple minutes.
Step 6: Open each petal and at the same time shape them into a real petal shape with your hand to add more dimension.


Step 7 & 8: When you finished shaping the petal, spray another layer of mist to make them more sparkly.

Step 9: For distressing look of the flower: paint the petal edges with distressing ink, then assemble the different sizes of petals together into a flower
Step 10: For glittery look of the flower: paint the petal edges with stickle (see right below)


Here are the semi finished flowers (distressing on the left and glittery flower on the right). It doesn't seem so sparkly on this picture, but it actually is quite sparkling. Final step to finish these flowers is to add a rhinestone or pearl in the middle, then you are done :o)


Hope you like what I prepared for you today and have fun trying them out. Thank you so much for stopping by today and will share more if there are more ideas :o)