Tuesday, June 29, 2010

Tutorial - Copic Coloring for Hair - YNS

Another tutorial? yep, another one. Here is another hair tutorial with a different stamp line. Today's sample is Cupcake Cutie Fhiona from YNS. I will be using the same three tones again. Since Fhiona's hair area is much bigger than Tilda, so I tend to use more brushing for this images.


*****Black Hair tutorial*****
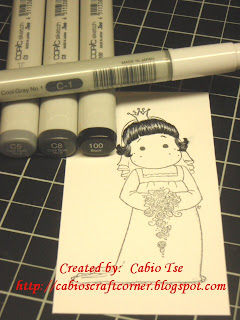
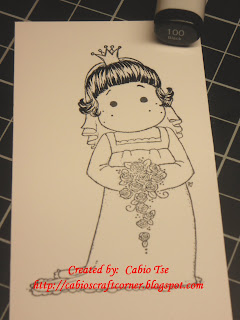
Black Hair - 100, C8, C5, C00
First, let's see the finished black hair sample


Step #1 - (Sorry, but I accidentally deleted the step 1 pictures) However, first marker is #100. You use the 100 to make a gap (space line) as her hair part to separate between the left & right section of top hair. (the part by her hair-band). When coloring her pony tail, use a little curve stroke to brush the marker from the top and brush it toward to the left side where her pony tail hanging. But remember to leave some space in between to fill shadowing later with some lighter markers.

Step #2 - Use #C8 to brush over the black but make the brush line longer than the 100 yet to leave some space for shadowing later.


Step #3 - Use #C5 to start brushing little lines from the edges of each last stroke of #C8, but still to leave a little space for the last light marker to shadow. For the middle part line, draw a very narrow straight lines lightly (See left pic below)

Step #4 - Use #C00 to brush over the part line and then also to fill up shadowing by brushing the rest of empty space.


*****Brown Hair tutorial*****
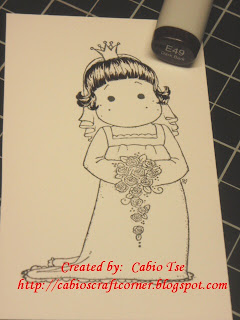
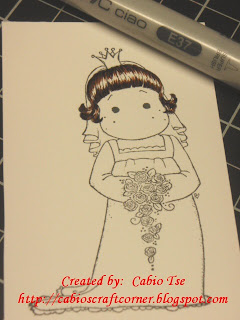
Brown Hair - E49, E37, E41 (These are my favorite brown hair combo)

Step #1 - you basically use the same stroke, but just using E49 to start. (See left pic below)

Step #2 - to use E37 brushing/blending in a curve motion, so that your pony tail and hair looks like it's moving from the wind....well...at least I am hoping that the result will look a bit like that :o)


Step #3 - Instead of using the circle motion to fill up the empty space, I like to do mine by brushing little lines, I find that it looks more natural that way, but you can just use whatever way that works for you and as you wish :o)


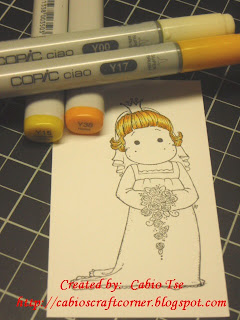
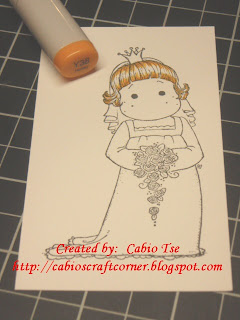
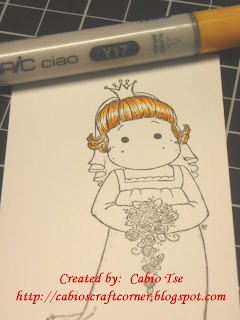
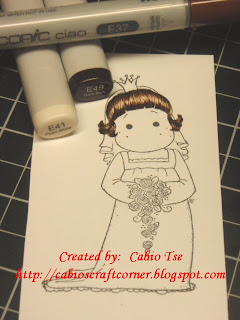
*****Yellow Hair tutorial*****
Yellow Hair - Y38, Y17, Y15, Y00

OK, I think you already have an idea, so I am just going to post the pictures to show you the marker #s.

Step #1 - see left pic below, Step #2 - see right pic below


Step #3 - see left pic below, Step #4 - see right pic below

Thank you for stopping by. I might have another same type of hair coloring to share with you for other stamp lines soon :o)

Monday, June 28, 2010

Magnolia Tilda Hair Tutorial

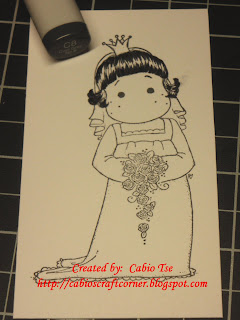
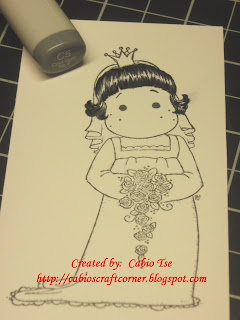
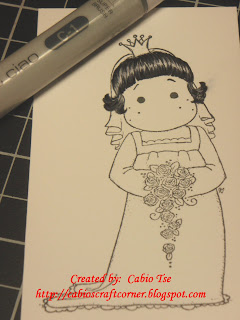
Good morning everyone. Phew....after so many busy evening...I finally come up with some hair coloring pictures tutorial. Since I am not very good at writing, I am posting as many pictures as I can with each Copic marker #, so that you will get an idea on what colors I use and the way I brush. I prepared pictures for different brand of stamps. (other stamp lines will be posting soon) On today's sample, I used Magnolia Tilda. I am posting the three hair colors (Yellow, Brown & black) pictures sample.


*****Yellow Hair tutorial
*****
Yellow hair - Y38, Y17, Y15, Y00


Step #1 - Y38 (left), then Step #2 - Y17 (right)


Step #3 - Y15 to move closer to the middle part, but be sure to leave a gap for the shiny shadowing, Step #4 - Y00 to brush the whole hair (including the empty middle part)


*****Brown Hair tutorial*****
Brown Hair - E49, E37, E41


Step #1 - Use E49 to star brushing from the edge of the hair toward the middle. Step #2 - Use E37 to brush from the edge toward the middle, then a little closer toward the middle but leave a little space for the light shadow to fill with E41.

Step #3 - Filled the rest of the empty space (for light shadowing in the middle).


*****Black Hair tutorial*****
Black Hair - 100, C8, C5, C1


Step #1 - Use 100 (black) Copic to start from the edge brushed toward the middle. Step #2 - use C8 to brush a bit more toward the middle. You have to be careful, or else you will ended up like me smash a dark spot (see right side of Tilda's image) on the paper.


Step #3 - Use a light color C5 to brush more toward to the middle, but leave some empty space in the middle for a lighter shadowing. Step #4 -last step, to use C1 to fill all the empty space of the hair.


That's all I have to share with you today. Hope you will find this helpful. I will be posting the same type of tutorial in the next few days but using other stamps. Hope you will be coming back again for a visit. Thank you for stopping by and see you again soon :o)

Sunday, June 27, 2010

YNS Cupcake Cutie Fhiona card for challenges

Good morning. Today I am sharing with you a quick card I made today. This week YNS is the sponsor for Off the Wall Craftiness Challenge #13. I am using the Cupcake Cutie Fhiona from YNS for my card today. Their challenge this week is to make a project from the inspiration pictures here:


I am also using this card for the following challenges:
Practical Scrappers - Flower
I Did it Creations Challenge #9 - Open Challenge
A Spoon Full of Sugar #109 - Good luck/Best wishes
Freshly Brewed Challenge #8 - Anything Goes
Kah-Wink-E-Dink Challenge - Free for All
Bunny Zoe's Crafts Challenge #1 - Nice and Girly

I also wanted to take this chance to thank my sweet blogging friend Ruby who sent me these wonderful cute Prima flowers. They are just the perfect color for this challenge. Aren't they lovely? Thank you Ruby :o)


A Closer view on Fhiona


Side view of this card.


Thank you so much for stopping by today. If you like my colored hair, I am in a process of preparing tutorials on my hair coloring. Hope to share them with you soon :o)

Saturday, June 26, 2010

YNS special sales....quick...it ends midnight Sunday

Hi, thanks for stopping by again. My third posts for today. For earlier card posts today, just click HERE.

PSSSSSSSTTTT.......Huge sale this weekend over at Your Next Stamp

* * * YOUR NEXT STAMP news * * *
15% OFF this weekend only (ends Sunday, June 27th at midnight EST) - enter the code Summer2010 when you checkout.
FREE copy of the Summer Issue of Scrapbook and Cards Magazine with any purchase (while stocks last).

Fab new release stamps now in stock -click on the What's New section to see all the new arrivals!

All 'retiring' stamp sets are on SALE at 35% OFF - quantities are limited so grab them before they're gone for good!

My PWCO Blog Candy's Winner is.......

Hello again, I finally get a chance to post the winner of my PWCO blog candy now. Thank you again for those of you who participated. The winner is drawn by Random.org and is #24 which will be 'TANYA RUDD"


Congratulations Tanya, below is what you win for this blog candy. Please email me at cabiotse@yahoo.com to notify me your address, so that I can mail this package to you.


PWCO DT card - Lucas the Lion

Good morning and happy Saturday. Yes, I am sharing with you today a card I made using the Lucas the Lion image. You can also see this card over at the PWCO Blog. Not sure why, but I feel like giving him some fluff, so what I did was grabbed some cotton balls and air brushed them using my YR24 Copic marker. I then shaped them into little ball pieces and glue them around Lucas' head and tail. It was a lot of fun, lol!


Closer view on this darling image


Side view of this card


Here is the inside and view of the dimension.

Image: PWCO Lucas the Lion
Ink: Copic Markers
DP: Three Bugs in a Rug, Jillibean Soup
Cardstock: Bazzill
Accessories: Rhinestones, ribbon, cotton ball, stickle

This project is also to be used for the following challenges:
The Shabby Tea Room Week #15 - "Cottage Comfort" Photo inspiration
Cards for Men Challenge #13 - Sketch
ABC Challenge Blog - X is for Xtra dimension
Recipe Challenges For Your Cards #20 - Sparkle + Altered Die Cut
Charisma Cardz Challenge #25 - For the boys

Thank you for stopping by today and enjoy the rest of weekend. Hope to share with you another project soon :o)

Wednesday, June 23, 2010

YNSC #18 - Printed Ribbon + More Blog Candy

Good morning all and happy Wednesday. It's the Your Next Stamp's challenge #18 already. It seems like the challenge #1 happened only yesterday, time sure flies! Oh, don't forget that there are still the revamping YNS set on sales for 35% off over at YNS online store with limited quantities remaining.

How do you like some more blog candy today? Scroll down to the bottom of this blog post for details to win my yummy candy!!!

This week's YNS challenge is hosted by our sweet Starlet Amy and she would like to challenge us to make a project using printed/patterned ribbon. I am also using this card for the following challenges:
WhoopsiDaisy Challenge - Ribbons and Bows
Kaboodle Doodles Challenge #33 - Anything goes with a dash of purple
KS Crew Challenge #26 - Inspired by ribbon

I used Fhiona and Her Best Buddie Fhinn by YNS for my card. These buddies are so sweet, so I sort of made it into a friendship/sweet heart theme.


Closer view on this cute image (left). This words "Your're My Pal" is from the Mixed Bag of Greetings set. I separated them into three words and spread them around the card with emebllies. (Right - punched/metal frame)


side view on this card


View to show you the dimension of this card


Hope you can join us along with the YNS challenge.


****BLOG CANDY ALERT****


YNS Rubber Stamp - Fhiona and her Pony Maggie
YNS Rubber Stamp - Mini Fairy Fhiona
YNS Rubber Stamp - Mini Bad Hair Day Fhiona
YNS Rubber Stamp - Mini Cupcake Cutie Fhiona
YNS Rubber Stamp - Mini Rainy Day Fhiona
Maya Road Clear Stamps - Journey East (Wildflower)

This blog candy will be closed on July 6th midnight. Winner will be anncounced within the week of this blog candy closed date.

How to win this Blog Candy:
(1) Leave a comment on this blog post. If you don't have a blog, please make sure you leave your email address when commenting, so we can reach you in case you win this blog candy.
(2) Become a follower of my blog and the YNS blog.
(3) Spread this blog candy alert by linking this candy to your blog.

Good luck to you everyone and thank you for stopping by. Hope to see you again soon :o)