

Materials you need are:
Box bottom - 6 1/2" x 5 1/2" cardstock
Box cover/lid - 6 5/8 x 5 5/8" cardstock
Inner divider - 6 1/4" x 4 1/4" designer paper/patterned paper
Nugget wrapper - 3" x 1" designer paper/pattered paper (you need 9 pieces)
Acetate/plastic for see through box lid - 4 1/2" x 3 1/2"
Scrap color cardstock for flower punch of nuggets toppers
Accessories:
Any stamp set - I used the "Flying Kite Fhiona" from Your Next Stamp on my sample here.
Small circle, flower punches for nugget wrapper toppers and any border punch for decorating side edges of the box cover/lid.
A little cotton ball to add more dimension on the cloud images (optional)
9 pieces of Hershey Nuggets
Spellbinder/Nesibilities shape cutter - I am using a flower shape on this sample. If you don't have any cutter, that's ok, you just have to leave your box closed without a window as you wish, the recipient will also have fun opening your box and find the goodies inside without knowing by peeking through the acetate window of the box cover.
Standard tools - glue, adhesive tape, scissors, Scor-Pal, scor-tape/double sided tape, double sided foam dots.

*****Nugget wrappers*****
Step 1 - Take a piece of 3" x 1" designer paper/patterned paper and wrapped around a piece of nugget and adhere the edge on the bottom (see picture below on the left)


Step 2 - Stamped 9 small birdie image on a piece of white cardstock, colored them all.
Step 3 - Punched them out using the small circle punch.
Step 4 - Adhered them into a color cardstock which looks like a little "flower" (see left picture below).
Step 5 - put a foam dots on the back of each "flower" and adhered them on each wrapped nugget


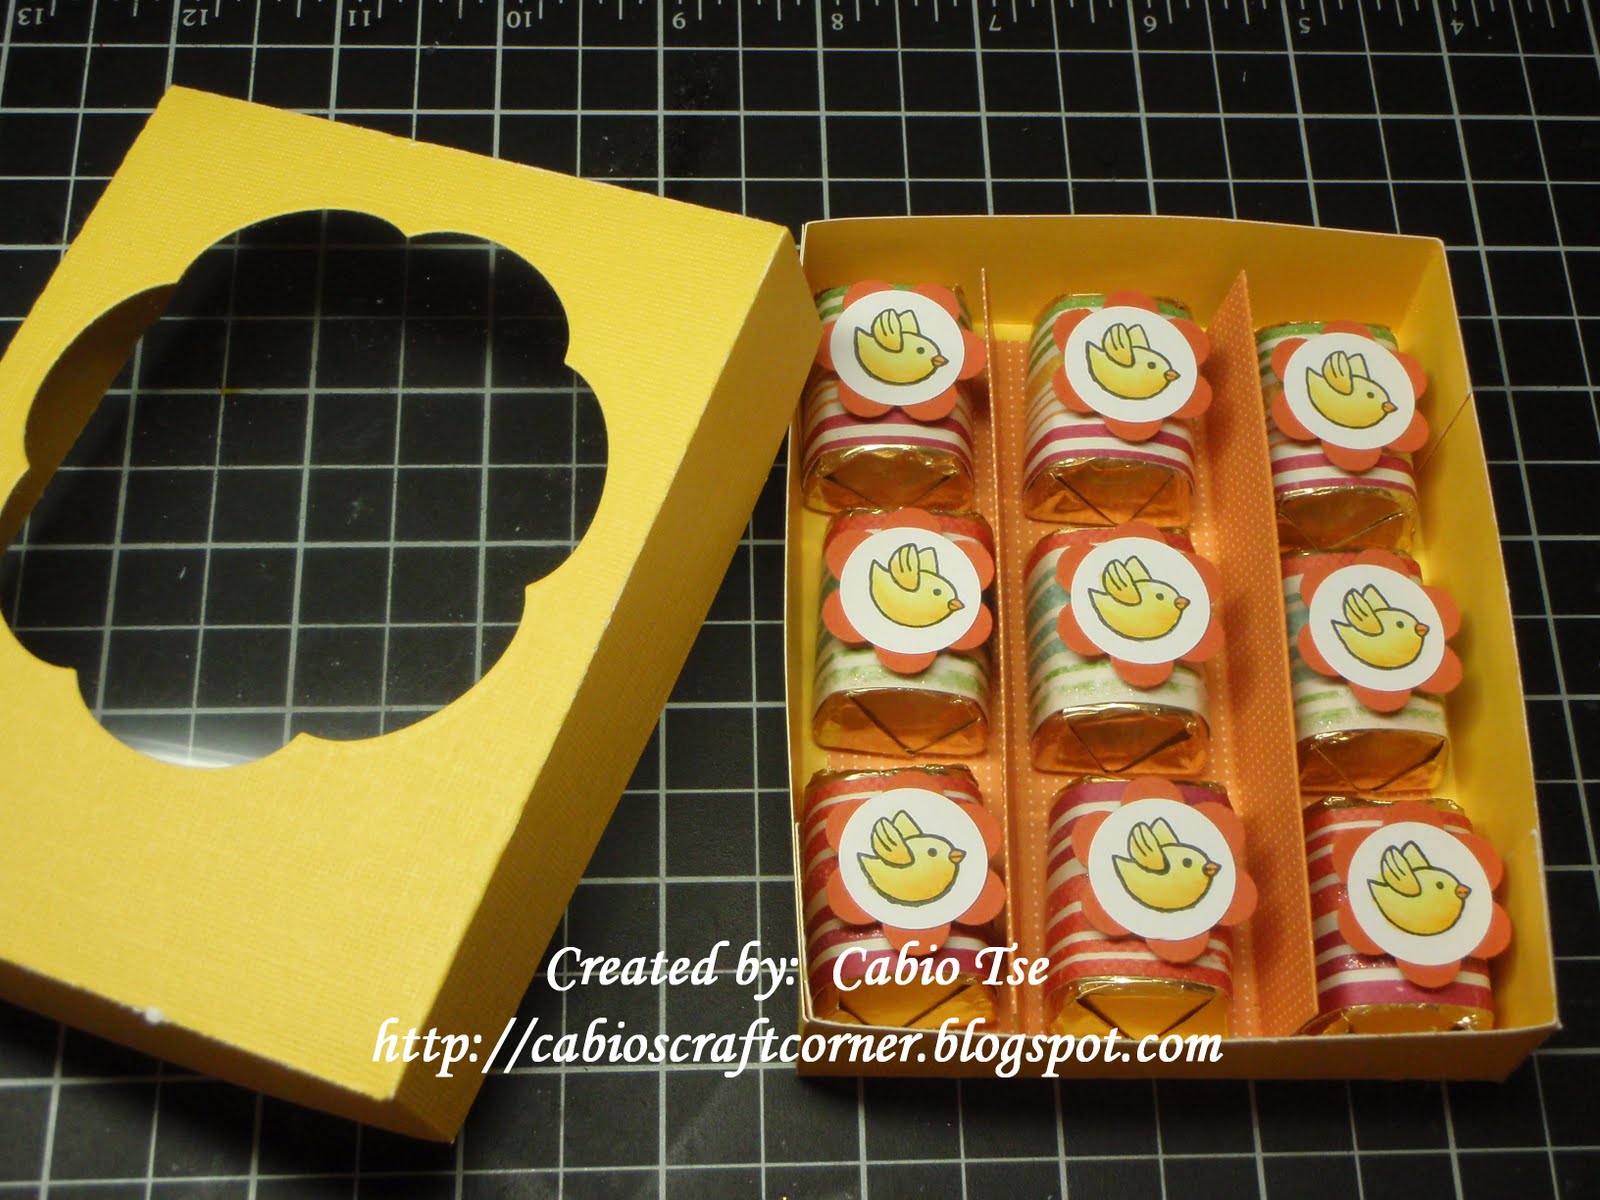
Here is the finished look on each nugget.

*****Box Cover/Lid*****
Step 1 - Take the - 6 5/8 x 5 5/8" cardstock, score 1" on each side.
Step 2 - After score each side, run a shape cutter through the middle of the cover to create a flower shape opening (see the picture on right below)
Note: I didn't run mine right in the middle, but toward the top more because of the way I wanted to apply my images for decorations which I feel that would look nicer that way.


Step 3 - take the 4 1/2" x 3 1/2" acetate/plastic sheet and put double tape on each side of the acetate sheet, and adhere it to the back of the box lid. (see the pictures of the right below)


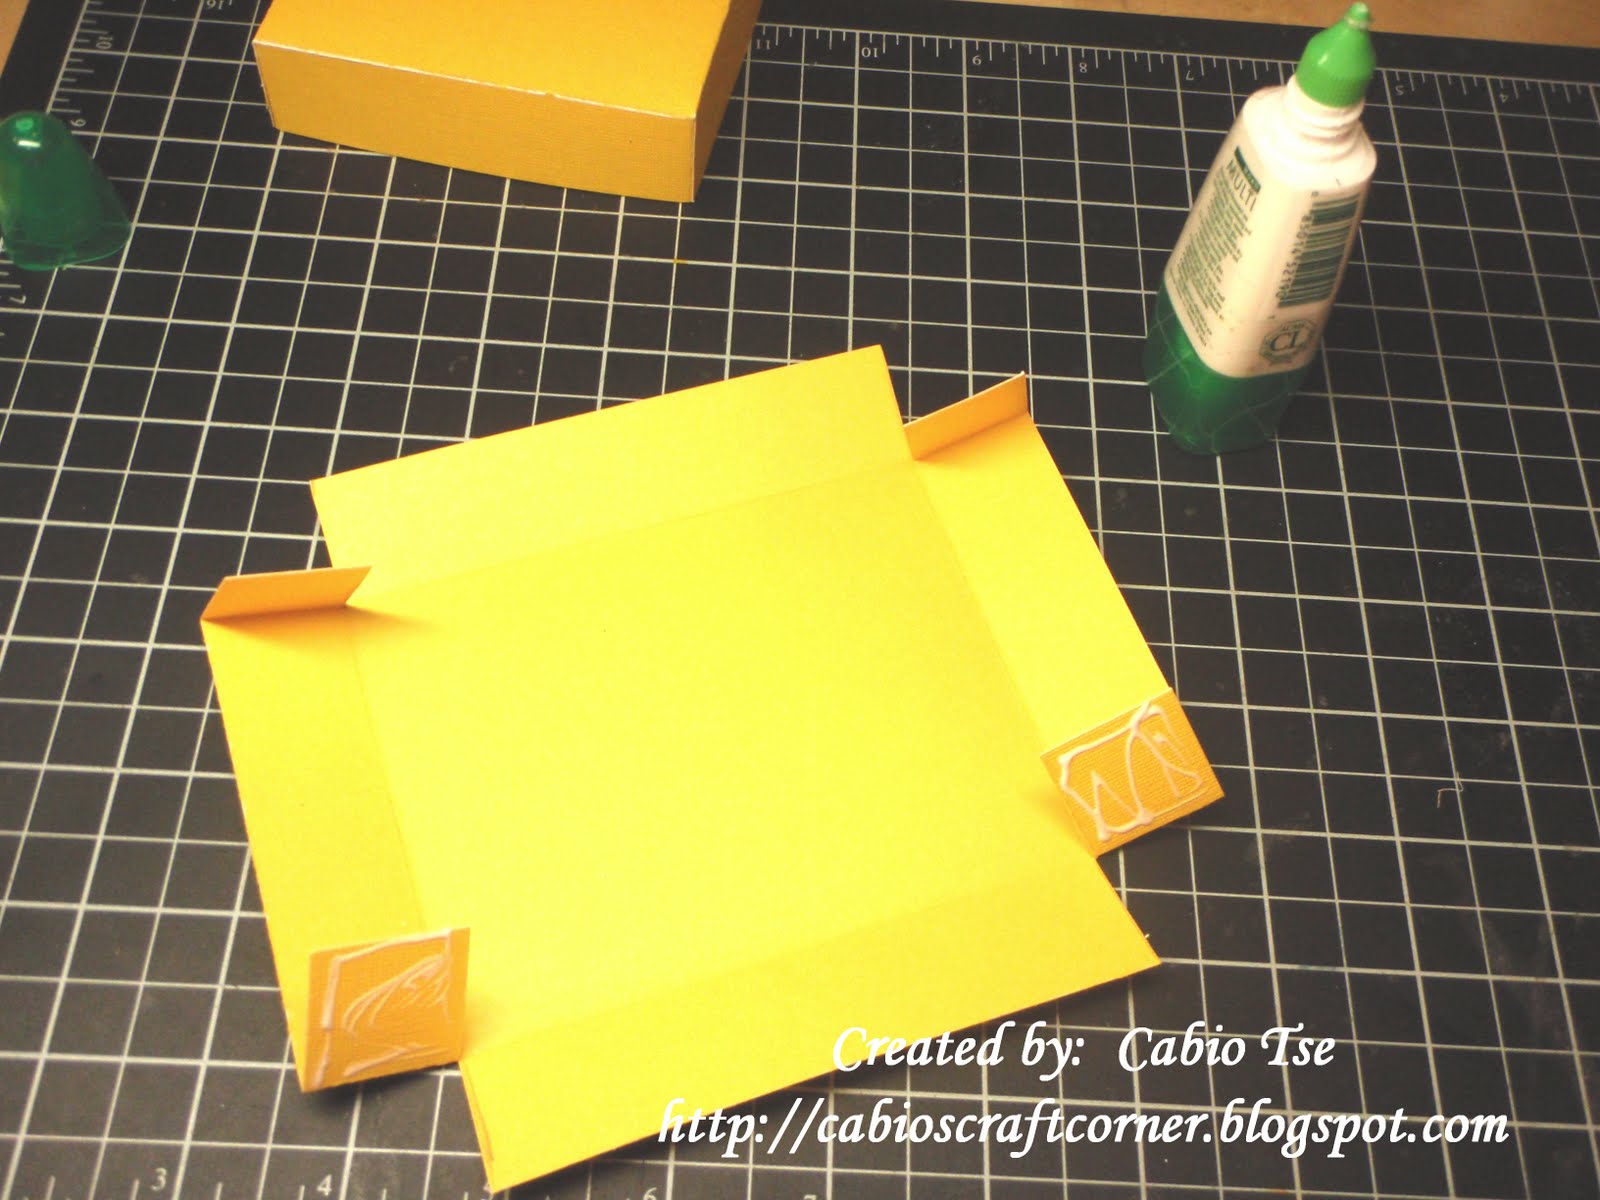
Step 4 - Cut open 4 corners according to the left pictures below and apply glue to put the box lid into the cover shape.


*****Box bottom part with inner divider*****
Step 1 - take the 6 1/2" x 5 1/2" cardstock and score 1" on each side
Step 2 - same as the box cover, cut a line on each 4 corner (see right picture below)
Step 2 - same as the box cover, cut a line on each 4 corner (see right picture below)


Step 3 - Same as the box cover, apply glue on the cut corner and glue them together to form a box shape.
Step 4 - put the 6 1/4" x 4 1/4" designer paper/patterned paper with long side across the top of your scoring tool, score at 1", 1 3/4", 2 1/2", 3 3/4", 4 1/2", 5 1/4" (see the left picture below)
Step 5 - fold along the scored lines in an accordion style (see the right picture below)
Step 5 - fold along the scored lines in an accordion style (see the right picture below)


Step 6 - Glue the inner divider inside the box by putting scor-tape/double sided tape on the bottom of the inner divide (see left picture below), then add the nuggets inside.

*****To decorate the candy box*****
Stamped the images from your stamp set, colored and cut them out. In this case, I adhered little piece of cotton on top of the little cloud images just because I think a little puff of bluff would be cute. Just use foam dots and adhere each images on the box to decorate as you desire. I also add some punched borders around the side edges of the cover, but you can also replace that with ribbon or stickers.

Sorry for the length of this tutorial, but I hope you like what I prepared for you.


21 comments:
sooo adorable, cabio! thank you for sharing this with us! have a great weekend! *hugs* steph :)
Ohhh Cabio,So beautiful.
Hugs Riet.xx
This is such a useful tutorial. Thank you for sharing with us!!! I can't wait to try this myself. Have fun in LV. Talk soon :)
Hugs,
Noreen
What a cute gift box..thanks so much for sharing with the tutorial!!
Terry
GREAT tutorial!! Love the box and the cutie embellies!!
Very good tutorial, I must try my self.
The box is adorable and your tutorial is so well done!! Love it!!
Fabulous tutorial, thanks for sharing it, I will have to try this out soon!!
Angela x
Thank You so much for posting this tutorial! I am going to use it in my Children's Church Class. I love it and it doesn't look very hard. Thanks again!!!
JoAnn
You are so awesome for sharing this most spectacular tutorial! Beth
What an awesome tutorial Cabio!! I love all the clouds and details around your opening. I will have to make one of these when I come back from my vacation.
hugs,
Chris
I absolutely LOVE this, Cabio! I'm definitely going to make one:) Thank you for the tut!!!
Fab tutorial! TFS!
Thx sweetie! I had a wonderful b-day at Nigara Falls. LOL...my hubby will never craft with me.
xoxo,
Lori
Wow, this is abs amazing!! Thanks for taking the time to write out all the instructions, including photos - I shall have a go sometime when a special friend needs a treat! Except, am not sure I wouldn't eat all the choccies myself before I was finished??! Thanks also for your sweet comment on my blog:-) Best wishes, Charlotte
Hi Cabio,
Another amazing tutorial.
Thank you so much for sharing all these wonderful technique with us.
Have a great day.
Luv,
Chelsea
Great project. Thanks for the tutorial.
Eeek~~!!! So cute! Great tutorial!!! Love the stamps you used!
Adorable and so yummie :)
Warmest greetings, Renata
Wow GREAT tutorial.... I love all your picture step by step details. Easy to follow along. Hugs... and TFS. Peggy
Great project, thanks for providing the tutorial for it!!
wow this is really fantastic... i came here coz of the PWCO blog hop and i can't help but browse through ur blog, love this one!
Post a Comment