Happy weekend to you all. Don't you just love the weekends?! It's time for some sneak peek on the upcoming release from Pixie Dust Studio. The upcoming release series is called "Wild Flower". When I first saw the images, I have to tell you that they are so impressive and cute. Today, I will use one of these adorable images to give you a sneak peek.
Please meet Zeeba the Zebra I used for this card. I need a birthday card, so use that as my theme for this one.
Closer view on the image and coloring.
Side view of this card. I used the bottle cap as my sentiment and embellishment.
You too can make this simple arrangement card. Just check out Kathy's Etsy shop on February 4th to see all her impressive images :o)
Saturday, January 30, 2010
Friday, January 29, 2010
ISS Blog Hop - Ava Holding Balloon+ challenges
Yeah, it's Friday and yes, it's my first time to participate the ISS Blog Hop. I really enjoy being the GDT here and happy to share their images with you.
Welcome to InStyle Stamps January blog hop! If you came from Virginia's blog then you are on the right track, if not, you'll want to start with Jodi. Make sure you visit each DT member's blog and at the end of the hop, you'll want to vote for your favorite DT's project and leave a comment HERE for YOUR chance to win 5 yards of new ribbon from May Arts.
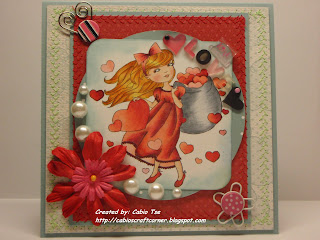
Today, I am sharing with you another sweet image from InStyle that I used for the project I made for this blog hop. The image used on this project is the Ava Holding Balloon. She is one of my Valentine projects. Last year I didn't prepare anything for Valentines, but I think this year, I prepared them early :o) I added stickle on the balloon and added some glitter heart stickers around the image.
I am also using this card for the following challenges:
Stamp Simply #124 - Bleeding Heart
Dare U2 Digi Stamp Challenge #30 - Hearts/Valentine
Hand Full of Stamps Challenge #14 - I give you my heart
Here is a closer view on Ava
Side view for the dimension.
View of the inside.
Thank you so much for stopping and your next hop is to Angélique's blog!!
Here is the full list of this blog hop:
Below is the hop order in case you're lost.
Jodi S
Genevieve
Cyndi
Lana
Maylee
Virginia
Cabio - You are here
Angelique
Mary
Linda
Joy
Janelle
Judy
Raquel
Margie
Julie
Lysa
Piali
I hope you enjoy this project and have fun hop over to the rest of DT to look through their fabulous projects.
Thursday, January 28, 2010
PDS Challenge #6 - 3D project
Good Thursday everyone. Today is my 16th year wedding anniversary. Wow I couldn't believe it's already 16 years and I haven't get tired yet with my hubby. Where did the time go? Well who knows?!
I've been busy for these past weeks. I couldn't even count how many projects I've made. All I can remember was that after I come home from work, I went straight down to my craftroom and work and work and work. Therefore, I have many posts in the line up to share with you for the next little while.
This time, I am posting an altered project for the Pixie Dust Studio Challenge #6. Our sweet Tammy is hosting this one and instead of making a card, she would like to challenge you to make a 3D project. My DT project this time is a note pad. I haven't use my 'Bind-it-all' for a while, so it gave me a good excuse to take it out again and use it.
I used the PDS Flutterby Friends image for this project.
Size & material info of this project:
2 pieces of 4" x 4" coasters (or cardboard)
2 pieces of 6"x 6" Designer/pattern paper to wrap the coasters
2 pieces of 3.75" x 3.75" Designer/Pattern paper (use a corner cutter to cut off each corner) to cover over each inside coaster piece.
Multiple pages of 3.75" x 3.5" inner white pages (cut whatever amount of pages as you wish, I cut out 35 pieces on this one). The top of 3.75" is for the spiral edge on top.
Here is the side view
Here is a shot when the pad is opened.
Thanks for looking and hope you can come by to the Pixie Dust Studio Challenge website to join us along!
Wednesday, January 27, 2010
D'Amour Allure card for challenges
Happy mid week!! Lots to do, but my week so far is pretty good and I hope yours are good too :o) I can't wait to share with you this card. I made this card not only because I wanted to use this cute stamp, but also I wanted to try out my new sewing machine.
Yes, I finally got a sewing machine which is my wedding anniversary present from my hubby although our wedding anniversary is not until Jan 28th and it's just days away. However I opened my presents and how could I not try it :op
Today's card is made using the Valentines Collection from D'Amour Allure. I found that the stamp is not only giving me a perfect outline, but also very fun for coloring too. I also use this card for multiple challenges too and they are for:
Midnight Madness Sketch Challenge #38 - Sketch
Little Red Wagon #13 - Hearts
Creative Inspirations #45 - Feminine
Stampavie and more Challenge #79 - Love card/Valentin
The Pixie Cottage Challenge #8 - Pink and red
Crafty Creations Challenge #51 - Valentines and Love
Belli Challenge #83 - Hearts
Allsorts Challenge Week #36 - Hearts & flowers
A Spoon Full of Sugar Challenge #88 - Freestyle
Lexi's Creations Challenge #6 - Valentines
Here is my finished card:
Closer view on this cute lovely stamp image
A shot to show you the embellishment from Queen & Co (the letters and hearts) The little transparent clip is from Around the Block
Side view of this card
Inside view
To match this love theme, here is a little "XO" piece from Queen & Co. I punched a little hold and use a brad to hold this little embellie which can be move around this brad.
Thanks for looking and will see you again tomorrow for a DT altered project :o)
Saturday, January 23, 2010
ISS Challenge - Cupcakes card
Happy weekend!!! I just love weekends that I can sleep in :o)
Love to share this card I made yesterday with you. This cute image from InStyle and over at ISS Challenge Blog currently, the challenge is to make a creation that incorporates a "Sweets" theme.
Here is my finished card with the CUPCAKES image from InStyle Stamps Online store.
Here is a closer view on this cute little cupcake image.
Side view of this card
I did a simple deco for space of the message inside.
So come by and play along over at ISS and have some fun! Thanks for dropping by today and will see you again tomorrow or Monday :o)
Friday, January 22, 2010
D'Amour Allure Valentines Card for Challenges
TGIF everyone! It's Friday, yeah....
I am quite happy today, because I made a card I like and what's even better was I put stitches on this card. I don't often use sewing machine. Simply because sewing is not my best skill, but I managed to use the machine without any problem this time. (What a shock to myself! lol)
I am using this card for the following challenges:
Midnight Madness Week #37 - Sketch
Crafty Creations Challenges #51 - Valentines or love
Belli Challenge #83 - Hearts
Caardrarks Challenge - Red Heart Challenge
Polka Doodles Challenge Week #2 - Love
Pile It On Challenge #2 - At least 3 ribbons
I don't normally use acrylic/clear stamps. I had bad experience using clear stamps previously, so I tried to avoid them as possible. However, I got to tell you about this stamp today. This cute stamp is from the D'Amour Allure Valentines Collection - crystal clear stamp collection.
Yes, you got that, it is a 'CLEAR' stamp. BUT, I got to tell you the quality of this stamp is SOOoooooo wonderful. It gives me the best stamp line. I couldn't believe my eyes how perfect the smooth line turned out on the white cardstock for me to color. Funny that it's so different than other clear ones I used before. Believe me that you got to try it and you will know exactly what I meant! You might like to check them out over here at Jeni's or at McMahon Five Design.com to get them or to learn about them.
Here is my finished card. Are you shock that I can really sew, lol. I made this Valentine card in a little difference process. My regular cardmaking procedure is usually to color an image first, then pick my DP and accessories to design the card along. This one, I picked all the DPs first and made the card, then the image was colored and fitted in at last. Since I decided to go toward more of a vintage/Victorian type of style, I picked out more ribbon/lace trims this time.
I am very happy with this card. Thank you so much for dropping by today! Over the weekend, I will get more done. Will have more to show you, so hope you will come again :o)
I am quite happy today, because I made a card I like and what's even better was I put stitches on this card. I don't often use sewing machine. Simply because sewing is not my best skill, but I managed to use the machine without any problem this time. (What a shock to myself! lol)
I am using this card for the following challenges:
Midnight Madness Week #37 - Sketch
Crafty Creations Challenges #51 - Valentines or love
Belli Challenge #83 - Hearts
Caardrarks Challenge - Red Heart Challenge
Polka Doodles Challenge Week #2 - Love
Pile It On Challenge #2 - At least 3 ribbons
I don't normally use acrylic/clear stamps. I had bad experience using clear stamps previously, so I tried to avoid them as possible. However, I got to tell you about this stamp today. This cute stamp is from the D'Amour Allure Valentines Collection - crystal clear stamp collection.
Yes, you got that, it is a 'CLEAR' stamp. BUT, I got to tell you the quality of this stamp is SOOoooooo wonderful. It gives me the best stamp line. I couldn't believe my eyes how perfect the smooth line turned out on the white cardstock for me to color. Funny that it's so different than other clear ones I used before. Believe me that you got to try it and you will know exactly what I meant! You might like to check them out over here at Jeni's or at McMahon Five Design.com to get them or to learn about them.
Here is my finished card. Are you shock that I can really sew, lol. I made this Valentine card in a little difference process. My regular cardmaking procedure is usually to color an image first, then pick my DP and accessories to design the card along. This one, I picked all the DPs first and made the card, then the image was colored and fitted in at last. Since I decided to go toward more of a vintage/Victorian type of style, I picked out more ribbon/lace trims this time.
Here is a closer view on this little cute girly image that fits perfectly to the vintage theme.
Side view of this card.
View of the inside. I added a vellum quote inside.
I am very happy with this card. Thank you so much for dropping by today! Over the weekend, I will get more done. Will have more to show you, so hope you will come again :o)
Thursday, January 21, 2010
PDS Sweet Tooth for challenges
Welcome to the Pixie Dust Studio Challenge #5. Hope you had fun with the shape card challenge last week. I sure do had fun myself looking through those wonderful entries. What a treat for eyes.
On to this week's challenge: Sweet Tooth-Glitter & sparkle. If you haven't check out Kathy's Sweet Tooth images, you might want to click HERE to see those and other fun images.
Today's card will also be my entry for the following challenges:
Stamp with Fun #42 - Sketch
Creative Card Crew Challenge #43 - Punch it
Simon Says Challenge - Punch it
The Corrosive Challenge #47 - Let's go digi
Bee Crafty Challenge #22 - Favorite Color Combo (red & blue)
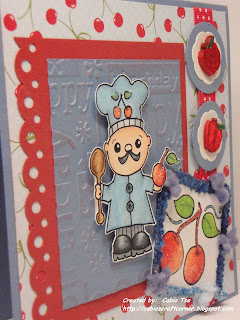
Here is my finished card. I used one of the Pixie Dust Studio's Sweet Tooth's image called "Chef Cherry O". The Cherry image is also from PDS. I applied stickles to add some sparkling effect on them.
Closer view for the coloring on these images
Side view of this card
That's all I have for you today. Thanks for stopping by and I have a Valentine card to show you soon, so please stay tune and I will see you soon :o)
YNS Blog Hop - Aloha Fhiona
****Welcome to the Your Next Stamps Blog Hop*****
Happy to see you here today and I am so excited to invite you to our YNS Blog Hop from today. Before I show you my creations today, I am going to give you some info on this blog hop so you too can join us to have some fun too!! If you are coming from Karen's blog, you are in the right path.
- Blog Hop will run from: Thursday 21st January (03:00 EST) to Monday 25th January (midnight EST)
How to enter the prize draw: To enter the grand prize draw, you need to add your name & blog link to Mr. Linky over at your last blog hop stop at Simonne's blog.
If you don't have a blog, you can still enter, but will have to leave your email address in a comment, so you can be contacted.
Also for the duration of the hop, Your Next Stamp is having a HUGE sale!! For 5 days only, there will be a whopping 25-55% off selected stamps!!!
I've prepared some creations using one of the new release set "Aloha Fhiona". Isn't the word "Aloha" given you some thoughts of a summer vacation? One of my memorable vacations was in 2007. When my family went to Japan, Taiwan & Hong Kong around March/April. I am showing you a picture we took in Japan when my husband and I brought our daughter to visit Puroland aka Hello Kitty Land in Japan. It was our first time there. Although we have no idea what they were talking about in the shows, but we had so much fun even just watching them.
Blog Hop in order:
Grand Prize: the entire new release (4 stamp sets - Surfer Fhinn, Aloha Fhiona, Rockstar Fhinn, Rockstar Fhiona) to one lucky winner.
How to enter the prize draw: To enter the grand prize draw, you need to add your name & blog link to Mr. Linky over at your last blog hop stop at Simonne's blog.
If you don't have a blog, you can still enter, but will have to leave your email address in a comment, so you can be contacted.
If you want an extra entry for your draw (see Blinkie Contest details here), then you are eligible for a 2nd entry into the grand prize! All you need to do is add your name a 2nd time to Mr Linky with the URL over at Simonne's blog at your last stop.
Also for the duration of the hop, Your Next Stamp is having a HUGE sale!! For 5 days only, there will be a whopping 25-55% off selected stamps!!!
I've prepared some creations using one of the new release set "Aloha Fhiona". Isn't the word "Aloha" given you some thoughts of a summer vacation? One of my memorable vacations was in 2007. When my family went to Japan, Taiwan & Hong Kong around March/April. I am showing you a picture we took in Japan when my husband and I brought our daughter to visit Puroland aka Hello Kitty Land in Japan. It was our first time there. Although we have no idea what they were talking about in the shows, but we had so much fun even just watching them.
Here are a couple pictures we took at Puroland in Japan. It was in March, but it wasn't that warm as we expected.
Here is my #1 project (card) for today - Aloha Fhiona. The flower, cocktail drink, Fhiona & the 'Hula Baby!' are part of this stamp set.
Show you a closer view on this cute little Aloha Fhiona. She is a doll!
This flower stamp also comes with the stamp set, I stamped 3 images and colored them in different colors.
Side view of this card.
View of the inside
This is #2 project (Candle with stamped images). Here is a little instructions, so very simple.
Step 1: Stamped the images on a piece of tissue paper.
Step 2: color the images
Step 3: cut out the image (just cut around the image, not necessarily to be exact on the line)
Step 4: lay the images on the candle, wrap a piece of wax paper around the candle to hold the images, use a heating tool to the wax paper where covers an image. The image will seal in with the candle. but please remember not to heat it too long or else, the candle be melted.
Step 5: slowly remove/unwrap the wax paper, and ta-da, your images (tissue paper) is now sealed in with the candle.
Step 6: stamped the sentiment on a plain color ribbon, adhered it around the candle.
I hope you like what I prepared for you and have fun playing with us for the blog hop. Your next hop will be the Talented Starlet "Kerri". Have fun visiting Kerri and good luck to you all :o)
Subscribe to:
Posts (Atom)